Wednesday 26 August 2009

After last month's delicious duo of Milan Cookies and Mallows, I was anxiously anticipating what delectable goodies we would be challenge with this month over at the Daring Bakers.  Lorraine of Not Quite Nigella and Angela of A Spoonful of Sugar did not let me down.  They chose the amazing and even famous Hungarian Dobos Torta.  Their rendition of the spectacular Dobos Torta is based on a recipe from Rick Rodgers' cookbook Kaffeehaus:  Exquisite Desserts from the Classic Caffes of Vienna, Budapest, and Prague.


Having never heard of the Dobos Torta (which rock have I been hiding under?), I went straight to the good ol' Wikipedia and punched it in.  It is a 5 layer cake sandwiched together with buttercream, first devised by Hungarian confectioner József C. Dobos in 1884 in an effort to create a cake with better keeping qualities.  The fine buttercream layers kept the cake moist and the caramel/toffee on top helped seal it also.  For many years the recipe remained a strictly guarded secret until his retirement in 1906 when he presented it to the Budapest Confectioners' and Gingerbread Makers' Chamber of Industry on the condition that all members be able to use it freely.


So, without further ado, here is the recipe as presented to us:

Dobos Torta


Prep times

  • Sponge layers 20 mins prep, 40 mins cooking total if baking each layer individually.

  • Buttercream: 20 mins cooking. Cooling time for buttercream: about 1 hour plus 10 minutes after this to beat and divide.

  • Caramel layer: 10-15 minutes.

  • Assembly of whole cake: 20 minutes


Sponge cake layers

  • 6 large eggs, separated, at room temperature

  • 1 1/3 cups (162g) confectioner's (icing) sugar, divided

  • 1 teaspoon (5ml) vanilla extract

  • 1 cup plus 2 tablespoons (112g) sifted cake flour (SUBSTITUTE 95g plain flour + 17g cornflour (cornstarch) sifted together)

  • pinch of salt


Chocolate Buttercream

  • 4 large eggs, at room temperature

  • 1 cup (200g) caster (ultrafine or superfine white) sugar

  • 4oz (110g) bakers chocolate or your favourite dark chocolate, finely chopped

  • 2 sticks plus 2 tablespoons (250g) unsalted butter, at room temperature.


Caramel topping

  • 1 cup (200g) caster (superfine or ultrafine white) sugar

  • 12 tablespoons (180 ml) water

  • 8 teaspoons (40 ml) lemon juice

  • 1 tablespoon neutral oil (e.g. grapeseed, rice bran, sunflower)


Finishing touches

  • a 7” cardboard round

  • 12 whole hazelnuts, peeled and toasted

  • ½ cup (50g) peeled and finely chopped hazelnuts


Directions for the sponge layers:

NB. The sponge layers can be prepared in advance and stored interleaved with parchment and well-wrapped in the fridge overnight.

1.Position the racks in the top and centre thirds of the oven and heat to 400F (200C).

2.Cut six pieces of parchment paper to fit the baking sheets. Using the
bottom of a 9" (23cm) springform tin as a template and a dark pencil or
a pen, trace a circle on each of the papers, and turn them over (the
circle should be visible from the other side, so that the graphite or
ink doesn't touch the cake batter.)

3.Beat the egg yolks, 2/3 cup (81g) of the confectioner's (icing)
sugar, and the vanilla in a medium bowl with a mixer on high speed
until the mixture is thick, pale yellow and forms a thick ribbon when
the beaters are lifted a few inches above the batter, about 3 minutes.
(You can do this step with a balloon whisk if you don't have a mixer.)


4.In another bowl, using clean beaters, beat the egg whites until
soft peaks form.


Gradually beat in the remaining 2/3 cup (81g) of
confectioner's (icing)sugar until the whites form stiff, shiny peaks.
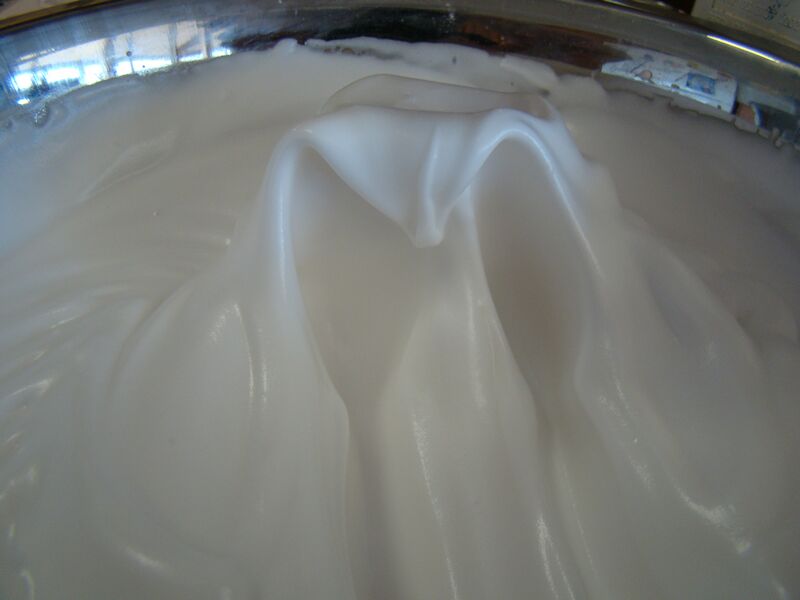


Using a large rubber spatula, stir about 1/4 of the beaten whites into
the egg yolk mixture, then fold in the remainder, leaving a few wisps
of white visible. Combine the flour and salt. Sift half the flour over
the eggs, and fold in; repeat with the remaining flour.

5.Line one of the baking sheets with a circle-marked paper. Using a
small offset spatula, spread about 3/4cup of the batter in an even
layer, filling in the traced circle on one baking sheet.


Bake on the
top rack for 5 minutes, until the cake springs back when pressed gently
in the centre and the edges are lightly browned. While this cake bakes,
repeat the process on the other baking sheet, placing it on the centre
rack. When the first cake is done, move the second cake to the top
rack. Invert the first cake onto a flat surface and carefully peel off
the paper. Slide the cake layer back onto the paper and let stand until
cool. Rinse the baking sheet under cold running water to cool, and dry
it before lining with another parchment. Continue with the remaining
papers and batter to make a total of six layers. Completely cool the
layers. Using an 8" springform pan bottom or plate as a template, trim
each cake layer into a neat round. (A small serrated knife is best for
this task.)

Directions for the chocolate buttercream:

NB. This can be prepared in advance and kept chilled until required.

1.Prepare a double-boiler: quarter-fill a large saucepan with water and bring it to a boil.

2.Meanwhile, whisk the eggs with the sugar until pale and thickened,
about five minutes. You can use a balloon whisk or electric hand mixer
for this.

3.Fit bowl over the boiling water in the saucepan (water should not
touch bowl) and lower the heat to a brisk simmer. Cook the egg mixture,
whisking constantly, for 2-3 minutes until you see it starting to
thicken a bit. Whisk in the finely chopped chocolate and cook,
stirring, for a further 2-3 minutes.

4.Scrape the chocolate mixture into a medium bowl and leave to cool to
room temperature. It should be quite thick and sticky in consistency.

5.When cool, beat in the soft butter, a small piece (about 2
tablespoons/30g) at a time. An electric hand mixer is great here, but
it is possible to beat the butter in with a spatula if it is soft
enough. You should end up with a thick, velvety chocolate buttercream.
Chill while you make the caramel topping.

Lorraine's note: If you're in Winter just now your butter might
not soften enough at room temperature, which leads to lumps forming in
the buttercream. Male sure the butter is of a very soft texture I.e.
running a knife through it will provide little resistance, before you
try to beat it into the chocolate mixture. Also, if you beat the butter
in while the chocolate mixture is hot you'll end up with more of a
ganache than a buttercream!


Directions for the caramel topping:

1.Choose the best-looking cake layer for the caramel top. To make
the caramel topping: Line a jellyroll pan with parchment paper and
butter the paper. Place the reserved cake layer on the paper. Score the
cake into 12 equal wedges. Lightly oil a thin, sharp knife and an
offset metal spatula.

2.Stir the sugar, water and lemon juice in a small saucepan. Bring to a
boil over a medium heat, stirring often to dissolve the sugar. Once
dissolved into a smooth syrup, turn the heat up to high and boil
without stirring, swirling the pan by the handle occasionally and
washing down any sugar crystals on the sides of the pan with a wet
brush until the syrup has turned into an amber-coloured caramel.

3.The top layer is perhaps the hardest part of the whole cake so make
sure you have a oiled, hot offset spatula ready. I also find it helps
if the cake layer hasn't just been taken out of the refrigerator. I
made mine ahead of time and the cake layer was cold and the toffee set
very, very quickly—too quickly for me to spread it. Immediately pour
all of the hot caramel over the cake layer. You will have some leftover
most probably but more is better than less and you can always make nice
toffee pattern using the extra to decorate. Using the offset spatula,
quickly spread the caramel evenly to the edge of the cake layer. Let
cool until beginning to set, about 30 seconds. Using the tip of the hot
oiled knife (keep re-oiling this with a pastry brush between cutting),
cut through the scored marks to divide the caramel layer into 12 equal
wedges. Cool another minute or so, then use the edge of the knife to
completely cut and separate the wedges using one firm slice movement
(rather than rocking back and forth which may produce toffee strands).
Cool completely.

Angela's note: I recommend cutting, rather than scoring, the
cake layer into wedges before covering in caramel (reform them into a
round). If you have an 8” silicon round form, then I highly recommend
placing the wedges in that for easy removal later and it also ensures
that the caramel stays on the cake layer. Once set, use a very sharp
knife to separate the wedges.


Assembling the Dobos

1.Divide the buttercream into six equal parts.

2.Place a dab of chocolate buttercream on the middle of a 7 1/2”
cardboard round and top with one cake layer. Spread the layer with one
part of the chocolate icing. Repeat with 4 more cake layers. Spread the
remaining icing on the sides of the cake.

3.Optional: press the finely chopped hazelnuts onto the sides of the cake.

4.Propping a hazelnut under each wedge so that it sits at an angle,
arrange the wedges on top of the cake in a spoke pattern. If you have
any leftover buttercream, you can pipe rosettes under each hazelnut or
a large rosette in the centre of the cake. Refrigerate the cake under a
cake dome until the icing is set, about 2 hours. Let slices come to
room temperature for the best possible flavour.

So, what did I do different??


Me being me, I had to make a few changes along the way - I can't help it.  We were having friends over for dinner the night I made it and B. is allergic to full fat dairy which ruled him out of the dessert due to the buttercream.  Luckily I had some left over lime custard in the fridge from some tarts I had made a few days earlier with some gorgeous Tahitian lime Dad had given me.  So I figured I would make a second torta using the lime instead of the chocolate. 
I made the sponge layers as per the recipe with the only difference being I used duck eggs (because we have ducks and I think they are immeasurably superior to chicken eggs for baking), and I made the layers square instead of round so I could cut them in half and make 2 rectangular cakes out of the one batch.  Matthew complimented me on "up there for thinking", I just thought I was being lazy!! lol!

Anyway, once the layers were all made I put aside one full layer (we will come back to this one) and then trimmed off one edge from each layer and measured out 11cm and cut to make 2 long rectangles.  When I stacked them, I put all the cakes with 2 trimmed edges in one cake, and the cakes with one trimmed edge and one rough edge in the other - aligning the cut edges on one side and the untrimmed edges on the other to keep it neat.
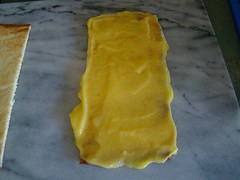
On the lime cake, I brushed each layer with some lime syrup that I whipped up (just equal parts water, sugar and lime juice boiled for 5 minutes - note to self - WATCH IT ON THE BOIL NEXT TIME - DRIED SUGAR SYRUP IS A PAIN TO HAVE TO CLEAN OFF THE STOVE TOP!!!).  I then spread on a layer of the lime custard, then the next layer of cake and so on, finishing with a cake layer.

For the chocolate cake, I brushed the cake layers with some raspberry liquer from the local winery before spreading the chocolate buttercream, continuing with the layering and finishing with a cake layer.

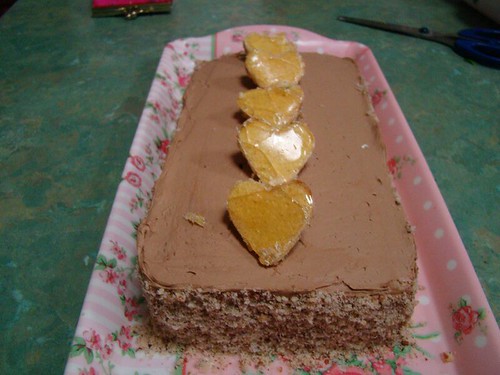
Now, back to that layer we put aside earlier, I pulled out a heart cutter (you already know about my penchant for cookie cutters right?  It's not a problem...really...is it???) and cut out heaps of hearts - turned out I only needed six and lay them in a silicone cake tin.  I then poured the caramel (toffee to us Aussies) over them as per the proper recipe, let it set, and cut it out again with the cutter.  Most of them smashed/shattered/broke.  Next time, I will dunk the cake hearts into the pot of caramel/toffee and then lay them on a silicon mat/baking paper.

I then took a lime and sliced it as thin as I could and poured some of the caramel/toffee over them and let them set.

Finally, I covered the chocolate cake with the remaining chocolate buttercream and pressed chopped hazelnuts onto the sides of the cake.  I then used whole hazelnuts to prop up the hearts along the length of the cake.

For the lime cake, I made a lime flavoured cream cheese frosting (yep, completely forgot about B. and his probs with dairy at this stage - some friend I am!!)  and covered the cake with it.  I pressed poppy seeds into the side of this one and placed the toffee coated lime slices on top.  YUM YUM!  Needless to say, B. loves his sweets, so his wife ate the frosting off his piece of lime cake and the toffee coated lime slices on top turned out to be the highlight of his evening.  Think I'll make him a big box of them for Christmas!


All in all, everyone loved both cakes.  The chocolate lovers and sweet-tooths loved the original chocolate version, and those of us who prefer our sweets not-too-sweet loved the lime version.  Both will DEFINATELY be made again!  Thanks Daring Bakers, and extra special thanks to Lorraine and Angela.

So, I wonder....what is on the cards for next month's challenge???

Tuesday 25 August 2009

August's Daring Bakers' Challenge has been chosen by Lorraine of Not Quite Nigella and me, Angela of A Spoonful of Sugar. We have chosen the famous Dobos Torta, a Hungarian speciality.

The reveal date is 27th August, 2009, and you must include the following lines in your post—before the “jump” or “cut—so that the blog-checking programme catches your post:

The August 2009 Daring Bakers' challenge was hosted by Angela of A Spoonful
of Sugar and Lorraine of Not Quite Nigella. They chose the spectacular Dobos
Torte based on a recipe from Rick Rodgers' cookbook Kaffeehaus:  Exquisite
Desserts from the Classic Caffés of Vienna, Budapest, and Prague.


So, what is the Dobos Torta (or Torte)?

Dobos torta

The Dobos Torta is a five-layer sponge cake, filled with a rich chocolate buttercream and topped with thin wedges of caramel. (You may come across recipes which have anywhere between six and 12 layers of cake; there are numerous family variations!) It was invented in 1885 by József C. Dobos, a Hungarian baker, and it rapidly became famous throughout Europe for both its extraordinary taste and its keeping properties. The recipe was a secret until Dobos retired in 1906 and gave the recipe to the Budapest Confectioners' and Gingerbread Makers' Chamber of Industry, providing that every member of the chamber can use it freely.

Lorraine and I would like you to make this famous cake which we chose in the spirit of being Daring and Challenging us. Variations are discussed at the end of this post and as always, if you have to make substitutions for dietary or financial reasons, that is fine.

Equipment

  • 2 baking sheets

  • 9” (23cm) springform tin and 8” cake tin, for templates

  • mixing bowls (1 medium, 1 large)

  • a sieve

  • a double boiler (a large saucepan plus a large heat-proof mixing bowl which fits snugly over the top of the pan)

  • a small saucepan

  • a whisk (you could use a balloon whisk for the entire cake, but an electric hand whisk or stand mixer will make life much easier)

  • metal offset spatula

  • sharp knife

  • a 7 1/2” cardboard cake round, or just build cake on the base of a sprinfrom tin.

  • piping bag and tip, optional


Prep times

  • Sponge layers 20 mins prep, 40 mins cooking total if baking each layer individually.

  • Buttercream: 20 mins cooking. Cooling time for buttercream: about 1 hour plus 10 minutes after this to beat and divide.

  • Caramel layer: 10-15 minutes.

  • Assembly of whole cake: 20 minutes


Sponge cake layers

  • 6 large eggs, separated, at room temperature

  • 1 1/3 cups (162g) confectioner's (icing) sugar, divided

  • 1 teaspoon (5ml) vanilla extract

  • 1 cup plus 2 tablespoons (112g) sifted cake flour (SUBSTITUTE 95g plain flour + 17g cornflour (cornstarch) sifted together)

  • pinch of salt


Chocolate Buttercream

  • 4 large eggs, at room temperature

  • 1 cup (200g) caster (ultrafine or superfine white) sugar

  • 4oz (110g) bakers chocolate or your favourite dark chocolate, finely chopped

  • 2 sticks plus 2 tablespoons (250g) unsalted butter, at room temperature.


Caramel topping

  • 1 cup (200g) caster (superfine or ultrafine white) sugar

  • 12 tablespoons (180 ml) water

  • 8 teaspoons (40 ml) lemon juice

  • 1 tablespoon neutral oil (e.g. grapeseed, rice bran, sunflower)


Finishing touches

  • a 7” cardboard round

  • 12 whole hazelnuts, peeled and toasted

  • ½ cup (50g) peeled and finely chopped hazelnuts


Directions for the sponge layers:

NB. The sponge layers can be prepared in advance and stored interleaved with parchment and well-wrapped in the fridge overnight.

1.Position the racks in the top and centre thirds of the oven and heat to 400F (200C).
2.Cut six pieces of parchment paper to fit the baking sheets. Using the bottom of a 9" (23cm) springform tin as a template and a dark pencil or a pen, trace a circle on each of the papers, and turn them over (the circle should be visible from the other side, so that the graphite or ink doesn't touch the cake batter.)
3.Beat the egg yolks, 2/3 cup (81g) of the confectioner's (icing) sugar, and the vanilla in a medium bowl with a mixer on high speed until the mixture is thick, pale yellow and forms a thick ribbon when the beaters are lifted a few inches above the batter, about 3 minutes. (You can do this step with a balloon whisk if you don't have a mixer.)


4.In another bowl, using clean beaters, beat the egg whites until soft peaks form. Gradually beat in the remaining 2/3 cup (81g) of confectioner's (icing)sugar until the whites form stiff, shiny peaks. Using a large rubber spatula, stir about 1/4 of the beaten whites into the egg yolk mixture, then fold in the remainder, leaving a few wisps of white visible. Combine the flour and salt. Sift half the flour over the eggs, and fold in; repeat with the remaining flour.
5.Line one of the baking sheets with a circle-marked paper. Using a small offset spatula, spread about 3/4cup of the batter in an even layer, filling in the traced circle on one baking sheet. Bake on the top rack for 5 minutes, until the cake springs back when pressed gently in the centre and the edges are lightly browned. While this cake bakes, repeat the process on the other baking sheet, placing it on the centre rack. When the first cake is done, move the second cake to the top rack. Invert the first cake onto a flat surface and carefully peel off the paper. Slide the cake layer back onto the paper and let stand until cool. Rinse the baking sheet under cold running water to cool, and dry it before lining with another parchment. Continue with the remaining papers and batter to make a total of six layers. Completely cool the layers. Using an 8" springform pan bottom or plate as a template, trim each cake layer into a neat round. (A small serrated knife is best for this task.)
A baked layer.

Directions for the chocolate buttercream:

NB. This can be prepared in advance and kept chilled until required.

1.Prepare a double-boiler: quarter-fill a large saucepan with water and bring it to a boil.
2.Meanwhile, whisk the eggs with the sugar until pale and thickened, about five minutes. You can use a balloon whisk or electric hand mixer for this.
3.Fit bowl over the boiling water in the saucepan (water should not touch bowl) and lower the heat to a brisk simmer. Cook the egg mixture, whisking constantly, for 2-3 minutes until you see it starting to thicken a bit. Whisk in the finely chopped chocolate and cook, stirring, for a further 2-3 minutes.
4.Scrape the chocolate mixture into a medium bowl and leave to cool to room temperature. It should be quite thick and sticky in consistency.
5.When cool, beat in the soft butter, a small piece (about 2 tablespoons/30g) at a time. An electric hand mixer is great here, but it is possible to beat the butter in with a spatula if it is soft enough. You should end up with a thick, velvety chocolate buttercream. Chill while you make the caramel topping.

Lorraine's note: If you're in Winter just now your butter might not soften enough at room temperature, which leads to lumps forming in the buttercream. Male sure the butter is of a very soft texture I.e. running a knife through it will provide little resistance, before you try to beat it into the chocolate mixture. Also, if you beat the butter in while the chocolate mixture is hot you'll end up with more of a ganache than a buttercream!

Directions for the caramel topping:

1.Choose the best-looking cake layer for the caramel top. To make the caramel topping: Line a jellyroll pan with parchment paper and butter the paper. Place the reserved cake layer on the paper. Score the cake into 12 equal wedges. Lightly oil a thin, sharp knife and an offset metal spatula.
2.Stir the sugar, water and lemon juice in a small saucepan. Bring to a boil over a medium heat, stirring often to dissolve the sugar. Once dissolved into a smooth syrup, turn the heat up to high and boil without stirring, swirling the pan by the handle occasionally and washing down any sugar crystals on the sides of the pan with a wet brush until the syrup has turned into an amber-coloured caramel.
3.The top layer is perhaps the hardest part of the whole cake so make sure you have a oiled, hot offset spatula ready. I also find it helps if the cake layer hasn't just been taken out of the refrigerator. I made mine ahead of time and the cake layer was cold and the toffee set very, very quickly—too quickly for me to spread it. Immediately pour all of the hot caramel over the cake layer. You will have some leftover most probably but more is better than less and you can always make nice toffee pattern using the extra to decorate. Using the offset spatula, quickly spread the caramel evenly to the edge of the cake layer. Let cool until beginning to set, about 30 seconds. Using the tip of the hot oiled knife (keep re-oiling this with a pastry brush between cutting), cut through the scored marks to divide the caramel layer into 12 equal wedges. Cool another minute or so, then use the edge of the knife to completely cut and separate the wedges using one firm slice movement (rather than rocking back and forth which may produce toffee strands). Cool completely.

Angela's note: I recommend cutting, rather than scoring, the cake layer into wedges before covering in caramel (reform them into a round). If you have an 8” silicon round form, then I highly recommend placing the wedges in that for easy removal later and it also ensures that the caramel stays on the cake layer. Once set, use a very sharp knife to separate the wedges.

Assembling the Dobos

1.Divide the buttercream into six equal parts.
2.Place a dab of chocolate buttercream on the middle of a 7 1/2” cardboard round and top with one cake layer. Spread the layer with one part of the chocolate icing. Repeat with 4 more cake layers. Spread the remaining icing on the sides of the cake.
3.Optional: press the finely chopped hazelnuts onto the sides of the cake.
4.Propping a hazelnut under each wedge so that it sits at an angle, arrange the wedges on top of the cake in a spoke pattern. If you have any leftover buttercream, you can pipe rosettes under each hazelnut or a large rosette in the centre of the cake. Refrigerate the cake under a cake dome until the icing is set, about 2 hours. Let slices come to room temperature for the best possible flavour.

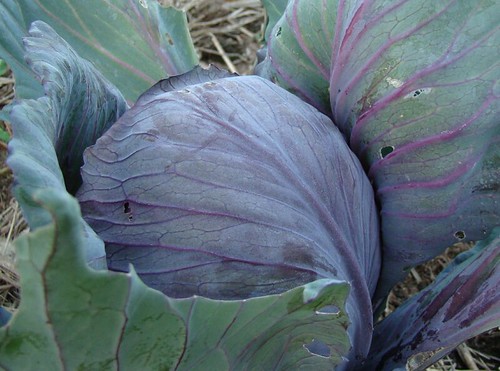
Cabbage


[caption id="" align="alignnone" width="500" caption="Still in the veggie patch"]Still in the veggie patch[/caption]

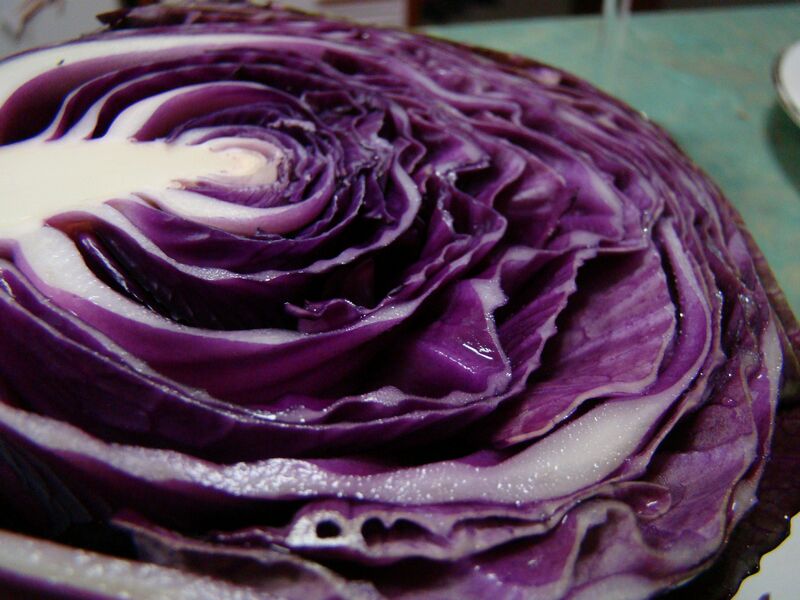
Super short post today.  I picked a cabbage yesterday.  I know, doesn't sound terribly exciting, but it is the first cabbage I have ever grown myself.  I've grown lots of herbs and had good success with zucchinis and cucumbers, but this is my first ever "hearting" vegetable.  It looked amazing.  Full and plump and crisp, and the most gorgeous purple, especially once cut into.


I'm a tad excited, and just wanted to share it.


[caption id="" align="alignnone" width="800" caption="And on the inside..."]And on the inside...[/caption]

Monday 24 August 2009

Spring Veggie Seeds Are Planted!

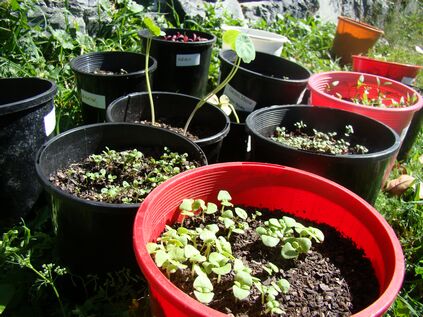
Well the calendar may say we still have another week of winter left, but Mother Nature has over-ruled.  Spring is definately here!  The thermometer hit 35C yesterday, and I reckon was probably nudging 30C today around lunch time.  I had been putting off planting my "sow in spring" veggies in case we got a late frost, but having not really had anything we could call a frost since winter last year, I figured I'd take the plunge.  I've decided to reserve the top veggie patch for berries, so I need to pull my finger out and order the rest of them this week.  The bottom veggie patch however is still full of my winter veg.  There is about 8 varieties of "pick and come again" lettuce, snow peas, sugar snap peas, shelling peas, 3 varieties of broccoli, bok choy, wombok, purple cabbage, leeks, loads of spinach, daikon and a few other things popping up around the place.  Since there is no room there at the moment, I picked up 5 broccoli boxes and some potting mix when I was in town the other day. (Fitting the 5 boxes plus shopping plus 3 super sized bags of potting mix plus 2 kids car seats in the little Pajero was a story unto itself!!)  I know styrofoam is not exactly the eco choice, but at least they are getting recycled.  Right??  I cut them down to

[caption id="" align="alignleft" width="84" caption="Broccoli Boxes make great seed raising trays"]Broccoli Boxes make great seed raising trays[/caption]

about 15cm high and then filled them with the potting mix before planting my veggie seeds.  Here is what I put in:  Beetroot (Chioggia - I love the pink and white rings - they looks so pretty thinly sliced in salad), Cabbage (Bok Choy & Wombok), Capsicum (Lipstick & California Wonder), Carrot (Nantes & a Colour Mix), Sweet Corn (Gladiator F1), Cucumber (Mideast Prolific - a lebanese style cucumber), Daikon (Japanese Radish), Eggplant (Lebanese, Rosa Bianca & Black Beauty), Jicama, Lettuce (Great Lakes, Baby Cos & Buttercrunch), Onion (Mini Purplette & Red Stem Welsh), Pumpkin (an unknown variety from friends & Butternut), Rhubarb (Sydney Crimson), Tomatillo (Purple), Tomatoes (Cherry Yellow Pear, Roma San Marzano, Tommy Toe & Thai Pink Egg), Japanese Turnip, Watermelon (Sugarbaby) and finally Zucchini (Golden).  I covered them all with a light layer of soil and put a piece of cardboard over the carrot seeds to hopefully get a better success rate with germination.  It will be interesting to see how they all go as I haven't had much luck with carrots or onions yet.  I'm really looking forward to the cucumbers and

[caption id="" align="aligncenter" width="423" caption="Kaffir Lime and its yummy double leaves"]Kaffir Lime and its yummy double leaves[/caption]

zucchini though.  Last year we had only 6 cucumber vines and were picking 10kg of cucumber every week!  They were so sweet and succulent too.  The zucchini fared really well also.  We were picking them at about 10-15cm in length while the flower was still intact and stuffing the flower before cooking the whole thing - zucchini and flower attached.  They were delicious!  There are a few things there that I haven't grown before either - these last 12 months being my first foray into gardening, so it will be interesting to see how they all go.  The fruit trees all look happy enough since planting them in last week.  We have Grapefruit, Kumquat, Dragonfruit, a Green Grape, Pear, Peach, Starfruit, Granny Smith Apple, Kaffir Lime, Tahitian Lime, Meyer Lemon, and Mulberry.  We also have 2 tiny blueberry bushes (twigs really) that are both covered in fruit and the raspberry bush that began as a single small cane last year is huge now and has new runners popping up everywhere.  I think I read you can dig the new runners up and replant them so I might pass a few on to friends.  The passionfruit vine we put in last year is looking lovely and lush so I am hoping for fruit from it this year and we were given another one 2 weeks ago from Monica - the lovely lady who gave us the Naked Neck Chickens.  Speaking of chickens, if the eggs she gave us were fertile, they should be hatching this weekend!!  Very exciting!  I am going to try and make an egg incubator this week with the help of a neighbour who has built one previously just in case they hatch as we will need to incubate the duck eggs that the chooks are sitting on.  Fingers crossed eh?!?

My herbs are all coming along nicely.

[caption id="" align="alignright" width="127" caption="Bay Tree"]Bay Tree[/caption]

The bay tree FINALLY has more than one leaf on it after about 8 months of sitting idle, so it is nice to be able to use it at last ... even if somewhat sparingly!  I am thinking of making a feature herb garden in the middle of the front yard and putting the bay in a nice big terracotta pot smack bang in the middle of all the herbs.  If it ever grows, I think it would look good as a central focus.  All the herbs that I planted 2 weeks ago are coming along nicely.  Most of them (Oregano, Zaatar, Orach, Chamomile, Marjoram, Nasturtium, Lemon Balm, Anaheim Chilli, Garlic chives, basil, Thyme, Parsley, Coriander & Dill) have germinated now and are starting to form their true leaves.  I'll have to get on to Matthew to dig the new garden bed for them.  The Rosella and Pomegranate have also popped up


[caption id="" align="alignnone" width="423" caption="Baby Herbs"]Baby Herbs[/caption]

through the soil so I will have to figure out where I am going to put them!  My Borage is looking amazing at the moment as all the flowers have started coming out.  I am going to make some cupcakes this week to celebrate and use the flowers to decorate them.  Might have to have some friends come over for morning tea to share them!

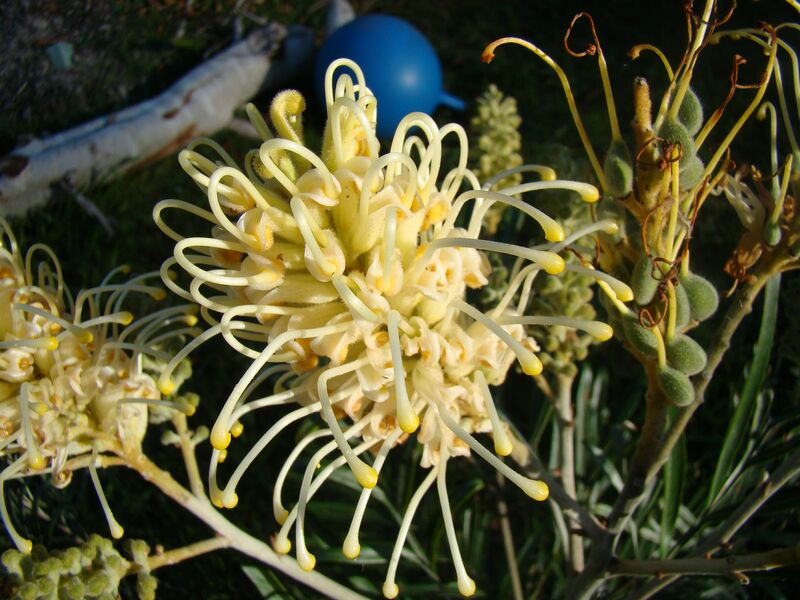
Finally before I go, here are some pretty flower pics from our garden.  Matthew grows the most beautiful Australian Natives.  I really don't understand why people don't put them in because "they want flowers" (as one lady said to us!!)  We have gorgeous flowers all year round.  What more could a girl ask for?  I'd take them over roses any day - plus they bring in all the lovely wild birds too.


Well, that's about all the news from the garden for today, so stay tuned as i will post pics as they (hopefully) grow.

Foodie Fights!!! Peaches and Tarragon

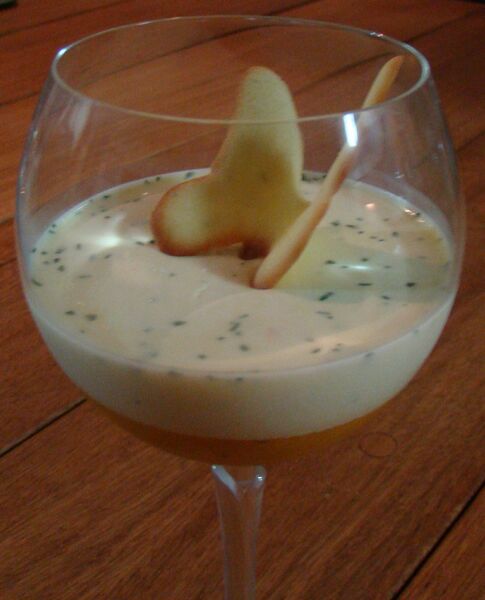
Peach and Tarragon Verrine with Tarragon Flecked Tuilles


If you've been following my blog, or even only read a post or two, you have probably realised a couple of things by now:
1.  I love food
2.  I love to cook
3.  I love a challenge; and finally
4.  I spend far too little time doing housework, and way too much time surfing the net looking at pictures of food!
Once you've taken all of these things into consideration, they kind of come together in the various challenges that I have partaken in so far.  I guess it was only a matter of time before I came across Foodie Fights.  Needless to say, my interest was immediately piqued, so I put in my application to participate in the next challenge.  I was very excited to see my name on the list of 10 participants for this fortnights challenge - Peaches and Tarragon.  Hmmm, this was indeed to be a challenge!  We are amidst the throws of winter here (although you wouldn't know it today...being 35oC!!) so fresh peaches are not exactly available.  Added to that, I'd only ever eaten them fresh - never cooked.  Then there was the Tarragon.  I knew it was a herb, often used in French cooking and usually paired with chicken?  I think????  So now I had to come up with a tasty recipe using an ingredient that I couldn't get with an ingredient I had never used, let alone tasted.  The announcement was out on Wednesday which gave me a few days to ponder my predicament.  Inspiration hit me at about 2am on Saturday morning.  Peach icecream with tarragon tuilles.  I have made icecream before - the old beater and freezer method as I don't have an icecream maker, and have wanted to make tuilles for ages after reading various peoples entrants in the a previous Daring Bakers Challenge.  However, we ended up with a really busy weekend and I didn't even get a chance to get in to town to buy ingredients until this morning, so I had run out of time for icecream.  Helene of Tartelette to the rescue!!  She is my absolute idol.  Amazing cook, fantastic food stylist, and unbelievable food photographer.  I jumped on her recipe for Mango and Vanilla Bean Buttermilk Pannacotta.  Perfect.  This looked yum and I figured I could adapt it easy enough, and still use my tuilles as a garnish.  I made a few changes to the original recipe, so here is what I did:
Peach and Tarragon Verrine


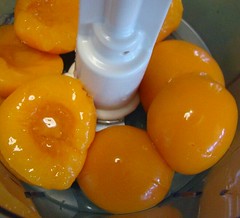
1 cup pureed tinned peaches (thank god for the canning process - I used 8 halves of peaches in natural juice!!)
3/4 teaspoon finely chopped fresh tarragon
1 tablespoon water
1 3/4 teaspoons powdered gelatin
1/2 teaspoon pure vanilla extract
1 cup heavy cream
1/4 cup sugar
1/4 cup heavy cream (extra)
3/4 cup full cream milk


Puree the tinned peaches with half of the finely chopped tarragon and divide among 4 glasses, being careful not to spill any excess on the inside of the glasses.  Place the glasses in the freezer.


Sprinkle the gelatin over the water and let it bloom.


In a medium saucepan, heat the 1 cup of cream with the sugar, remaining chopped tarragon and vanilla until the cream is just about to boil, stirring occasionally to make sure the sugar dissolves completely. Remove from the heat and stir in the gelatin until completely dissolved.


Let the mixture cool for about 10 minutes then add the extra 1/4 cup of cream and the milk. Allow to cool to room temperature. You can speed up the process by placing your saucepan over a bowl filled with ice but keep and eye on it as it will thicken faster. Once the cream is cooled, slowly pour it over the frozen fruit and let set in the fridge, at least two hours, preferably overnight.
Tarragon Flecked Tuilles


65 grams softened butter

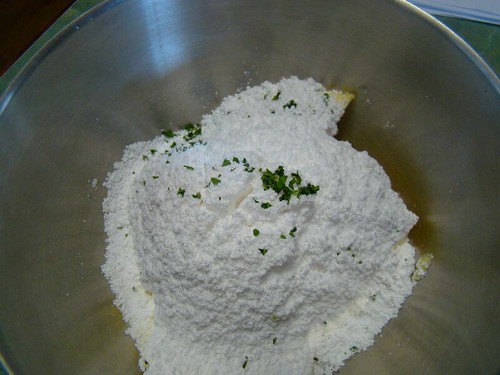
60 grams sifted icing sugar mixture

1 teaspoon pure vanilla extract

2 large egg whites (slightly whisked with a fork - I use duck eggs for baking)

65 grams sifted plain flour

1/2 teaspoon finely chopped tarragon

Preheat oven to 180C or 160C fan forced.

On low speed, cream together butter sugar and vanilla until just combined.  Gradually add egg whites and beat only until combined to a smooth batter.  Be careful not to overmix.
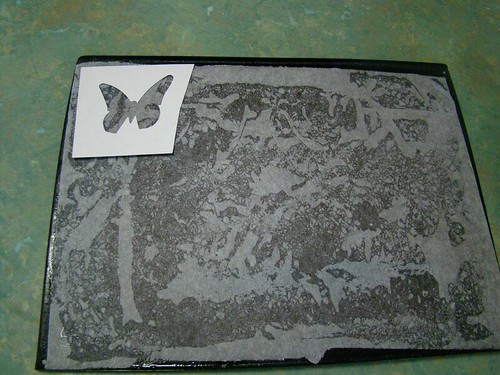
Line a tray with baking paper.  If using a stencil, place it on the paper

and hold down with one hand while using an offset spatula with the other to gently smooth the batter over the stencil.
http://farm4.static.flickr.com/3449/3851368295_53abcba21b.jpg
You want a thin but even layer of batter.  Now, very carefully remove the stencil.  I found it easiest to start at a corner and pull the stencil up on the diagonal.
http://farm3.static.flickr.com/2444/3851368409_70640c597d.jpg
Make 3 more in this way then place in the oven for 4-5 minutes until lightly browned around the edges.

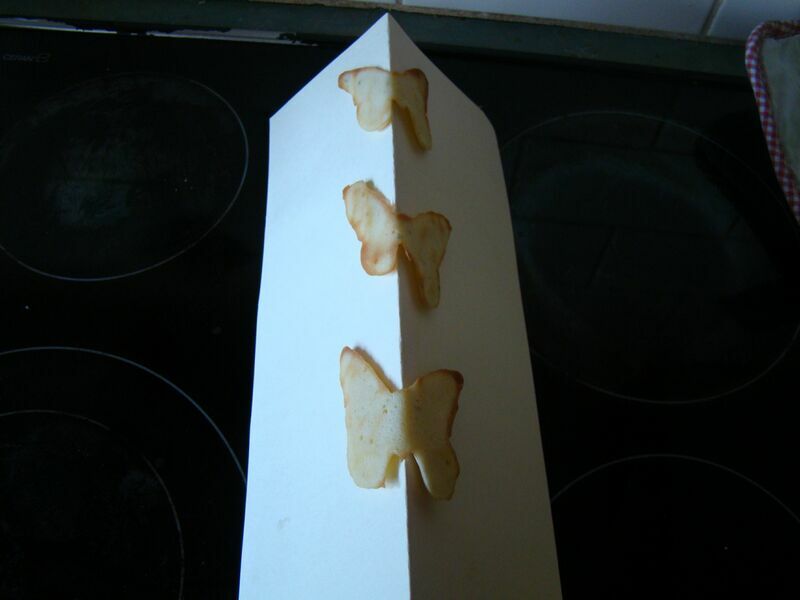
As soon as they are cooked, remove from the oven and shape over a folded piece of cardboard.  You have to do this really fast before they cool and set.


This is why you only want 4 biscuits at a time on the tray, otherwise they snap when you try to bend them.  Mind you, the kids think it's a good thing because they get to eat all the broken ones!!  Allow them to cool completely before removing them from the card to a SAFE PLACE away from curious little fingers!  (Like I said, the kids like to eat the broken ones - they don't care who breaks them!!!)

When ready to serve, place one or two of the tuilles on top of the cream mixture in the glass, then sit back with a spoon and enjoy!!

So, what did we think of the taste??  Yum yum yum!  The kids both loved it, and Matthew said it is a definate must next time we have people over for a meal.  I was feeling really dubious about it, having never combined fruit and herbs like this, and not being a great fan of pureed anything as it just looks like regurgitated baby food to me, but this blew me away!  The peach puree was lovely and cold and refreshing, and the tiny bits of tarragon through it added a lovely extra "note".  The cream layer set into a beautiful, silky concoction which delicately melted away with a creamy, but not fatty mouth feel.  The coolness of the fruit perfectly balanced the mousse-like texture of the cream.  The little tuilles on top were a cute finishing touch with a lovely vanilla taste and soft bite.  The tiny flecks of tarragon in them left a really pleasant aftertaste, which also tied them in with the main part of the dessert.

I am definately going to make this dish again, and can't wait for the arrival of summer so I can make it with fresh juicy peaches.  Thanks Helene for the inspiration and thank you also to Foodie Fights for pushing me out of my comfort zone to find a new favourite dish!  Definately a success!!  Now I've just got to go and plant some tarragon in the garden......

Oh yeah, and if you like the looks of this, please head on over to Foodie Fights and vote for me (Nana Glen Mum).  thanks heaps!